Table of Contents
 Growing black-eyed peas is a fun activity for the whole family. Let’s face it – there are a lot of vegetables! Growing Black-Eyed Peas is one of the many vegetables grown year-round in your home garden. This article has all the information you need about this versatile vegetable, including how to grow Black-Eyed Peas from seed and how long it will take to grow.
Growing Black-Eyed Peas – A-Z Guide
Planting black-eyed peas are quite easy, especially if you have a garden that has been established for a few years—the seeds are planted directly into the ground, where they will germinate and grow fairly quickly.
If you are planting black-eyed peas in a container or pot, you will want to start them indoors to make sure they have enough time to grow before the frost comes into your area.
When planting black-eyed peas, it is important to remember that they need warm temperatures and water to grow properly. If there is not enough water available for them, they will not grow well. If there is not enough sun for them either, they may not even sprout.
Overview
Black-eyed peas are a cool season legume that can be planted in most areas of the United States. It depends upon your soil type, you may need to adjust the planting time for these peas. For best results, plow under 1 inch of topsoil before planting and work in a layer of compost or aged manure. Plant black-eyed peas 2 inches deep and 3 feet apart. Water regularly, especially during warm weather, and fertilize with a balanced fertilizer at least every 3 months during growth. Harvest pods when they are bright green and tender, usually in late fall or early winter.
Warm Weather Crop

Black-eyed peas are a warm-weather crop, so they only grow when temperatures exceed 60 degrees Fahrenheit. They grow well in soil rich in organic matter, like compost or manure. They also do well in sandy loam soil and clay soils with good drainage.
Black-eyed peas need full sun to grow properly. Plant your black-eyed peas immediately after you get them from the nursery or garden center if you live in an area with full sun for most of the day. You can also start them indoors and transplant them into the ground once they have reached about 2 inches tall.
Easy to Plant
Black-eyed peas are easy to plant and take up very little space in your garden. These bush beans will grow to a height of 2 feet tall and produce pods that contain 3 – 5 seeds each. They should be planted in rows 12 inches apart, with each plant spaced 24 inches apart from one another.
Types Black-eyed Beans
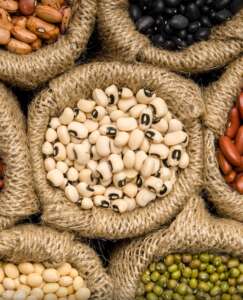
There are two main types of black-eyed peas: bush and dwarf.
Bush Beans
Bush types are taller and have broader pods than dwarf types, which grow shorter and slender pods.
Dwarf Beans
Dwarf types are better suited to sandy soils, while bush types perform better on loam soils.
Among these two types, please choose one of the beans you want to grow based on its size and shape.
Cautions before Planting
- If you are planting black-eyed peas in a container or pot, you have tostart them indoors to make sure they have enough time to grow before the frost comes into your area.
- When planting black-eyed peas, it is important to remember that they need warm temperatures and water to grow properly. If there is not enough water available for them, they will not grow well. If there is not enough sun for them either, they may not even sprout.
Note: Get an early start – Black-eyed peas need at least six weeks of warm weather to germinate. Start seedling indoor 4 – 6 weeks before the desired planting date, and then transplant them when the soil is warm and moist.
Simple Steps to Grow
Suitable Seeds
First and foremost, you will need to purchase a suitable seed. Wide varieties are available, so choose one suited to your climate and growing conditions. Once you have your seed, it’s time to get started!
Sock the Beans in Water
You have to start by soaking the beans overnight in water. This will soften them and make them much easier to digest.
Spread a Layer of Newspaper
Spread out a layer of newspaper on a flat surface in your garden, and place the beans on top. Place another layer of newspaper and weigh down the newspapers with something heavy, like a rock or pot. Leave the beans planted this way for about two weeks or until they develop green pods.
Prepare the Soil
Black-eyed peas can tolerate many different soils, but they prefer rich, well-drained soil with plenty of organic matter. If your soil is heavy or has low nitrogen content, add compost or rotted manure before planting.
Plant them in Rows
Once the beans have germinated, it’s time to begin planting them in rows. Space them about 2 feet apart in each row and Water them regularly using a spray bottle.
Plan Direct into the Garden
Plant black-eyed peas directly into the garden as soon as possible after the danger of frost passes. The seeds shall plant 1/2 inch deep and 6 inches apart in rows 12 inches apart. Seeds may broadcast over the entire area that you want to plant.
Water Regularly
Water regularly until the seeds germinate (about five days). After germination, water only when it rains or when the soil becomes dry to the touch (about once per week).
Fertilizers or Compost
Apply fertilizer once a month while the plants grow to promote even growth and good yields.
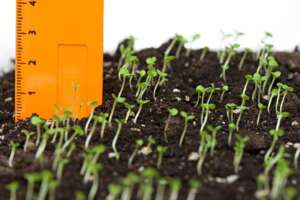
Thin the Plants
When the plants are nearly 6 inches tall, thin them out, so there’s only one plant every 12 inches. This helps prevent disease and makes room for plants to grow once they produce pods.
Pinch off Flowers
Pinch off any flowers that appear until you see some pods forming on your plants. This will help prevent any unwanted cross-pollination between your plants and those of nearby gardens where other types of beans are growing. It also prevents your plants from wasting energy producing flowers instead of fruit.
Mulch
Protect your plants from harsh weather by mulching them with straw, compost, or leaves in late fall or early winter. This help to keep the soil warm and moisture-rich while protecting against weeds.
Harvest
Harvest beans when they are dark green and firm, but not too hard. Overripe beans will become dried out and tough to eat.
Conclusion
This article covered all related concerns about growing black-eyed peas. We discussed the best time to grow black-eyed peas and what type of weather they need, from planting to harvesting. We hope this article is helpful and that you will try planting black-eyed peas this season!